Icons are one of the important parts of application development. It is difficult for developers to find icons of different sizes and colors quickly. In this tutorial, we will learn how to add the Material Design icons plugin to android studio. At the end of this tutorial, we will easily be able to add icons to our Android Applications.
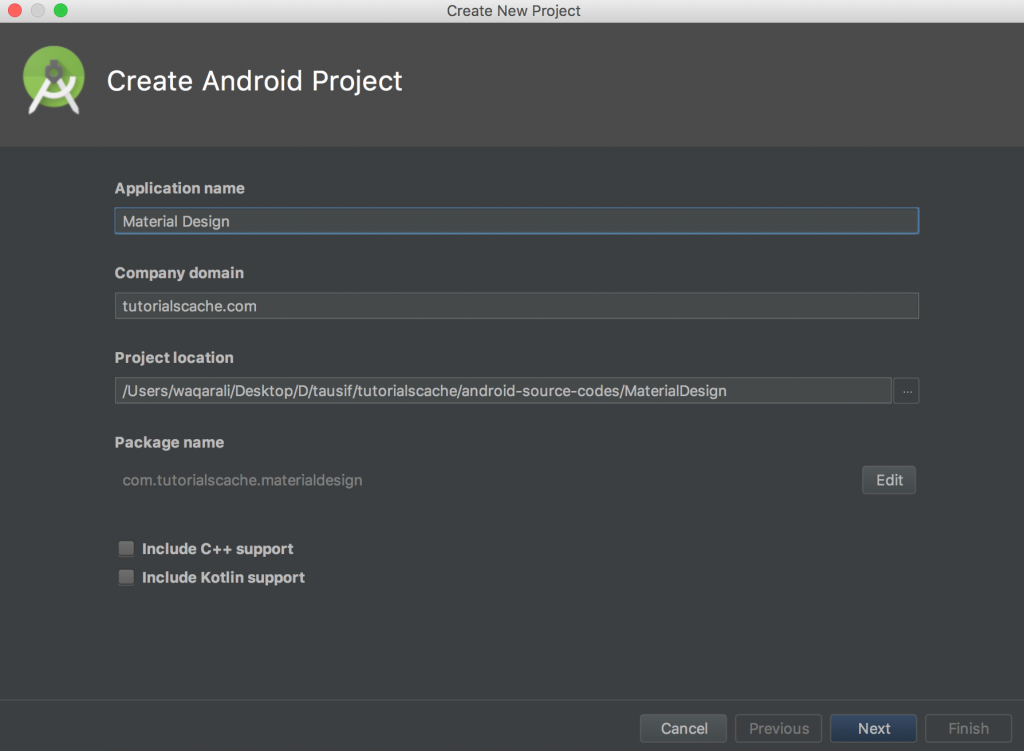
So let’s get started with a fresh android studio project.
1. Create New Android Studio Project
2. Material Design Icon Plugin
Now we need to add a material design plugin to android studio.
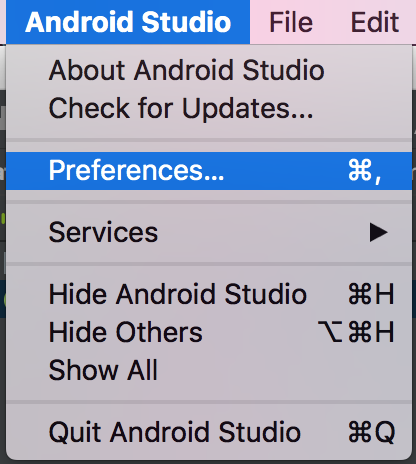
Click on Preferences under the Android Studio Main menu or press COMMAND+, on Mac.
Search for the Plugins menu in the search bar.
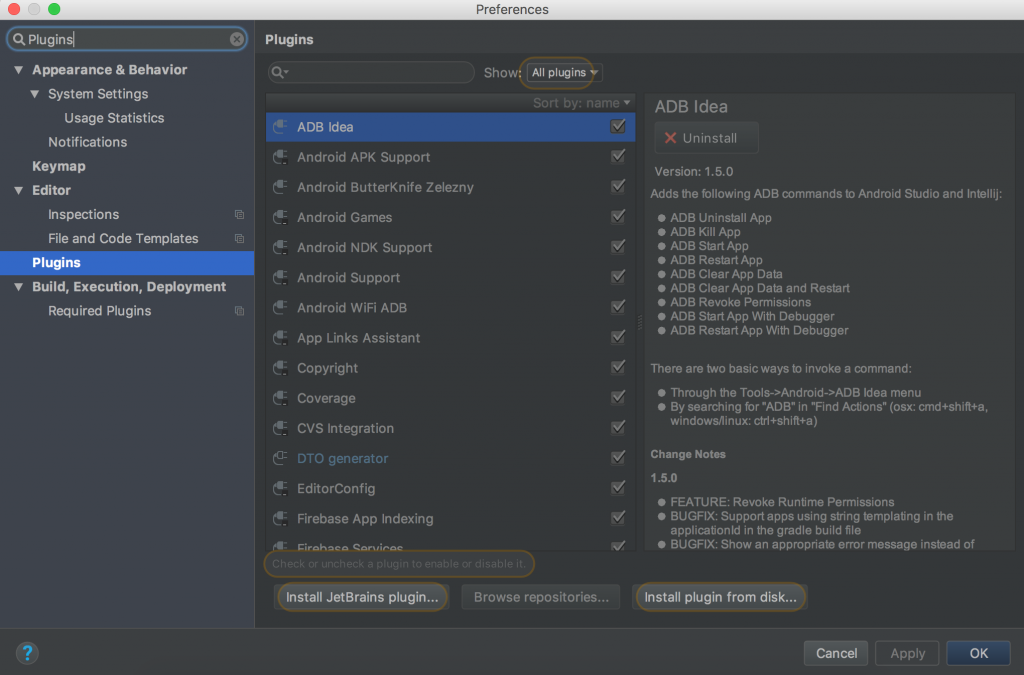
Now we need to click on Browse Repositories and search for “Android Material Design Icon Generator”.
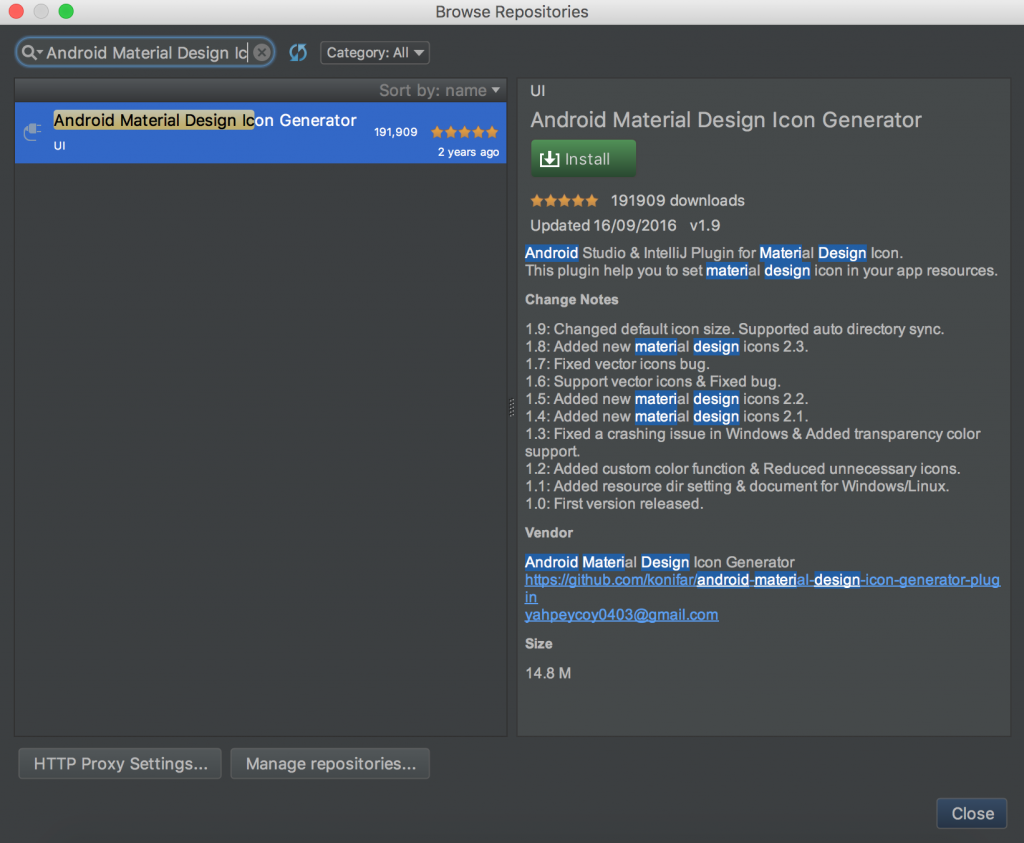
Now we need to click on install and after successful installation, we need to restart android studio so plugins get loaded.

Soon after restarting the android studio now we need to click on File > New and scroll to the bottom to find the Material design Icon plugin.
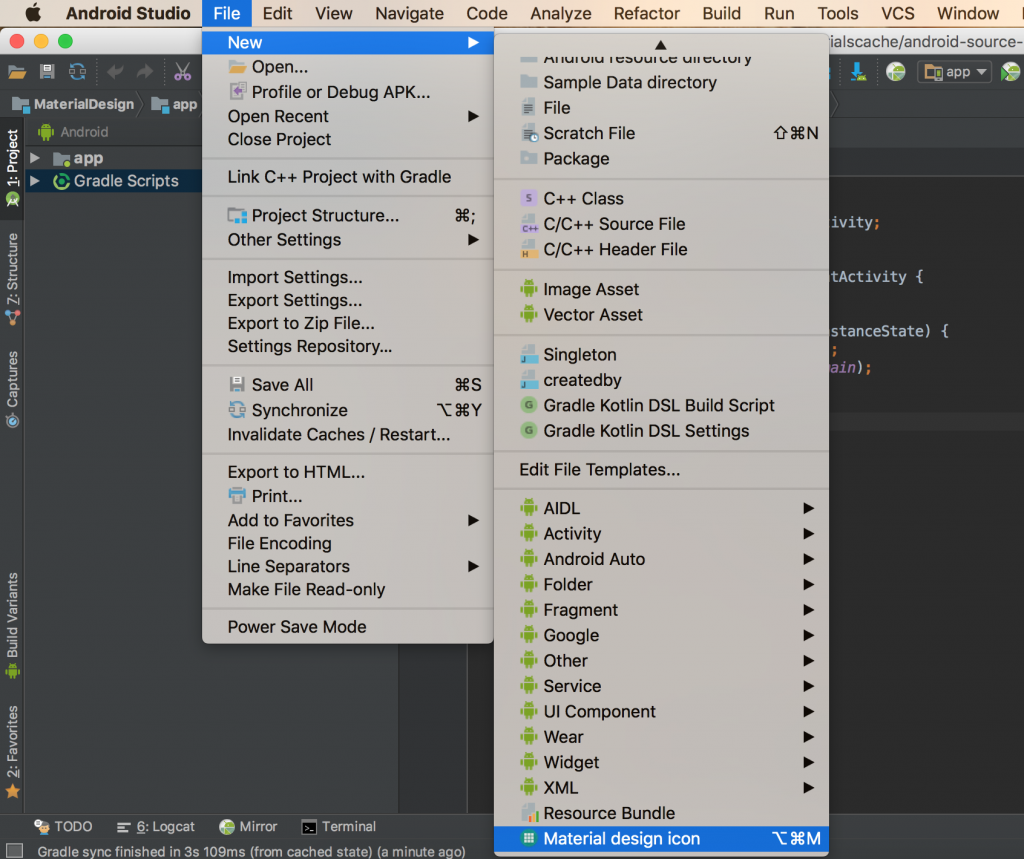
After clicking on the Material Design icon menu item we will be able to see the icon generator popup.
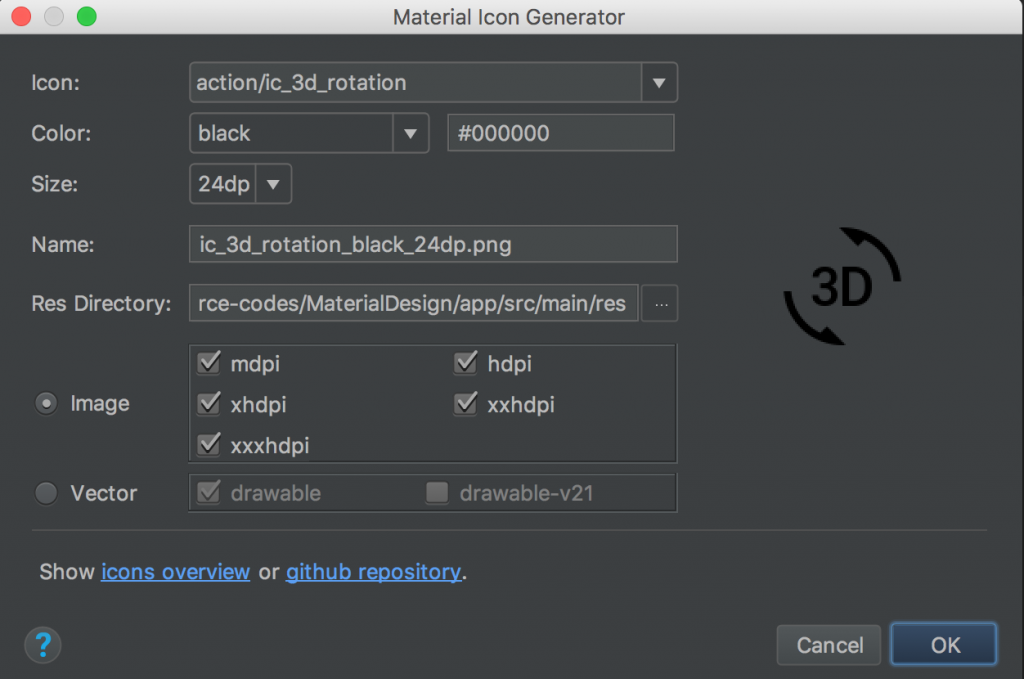
3. Icon Search
It’s very easy to search icons. We just need to start typing the icon name and this plugin will show us suggestions from which we can choose easily. We can also see icons just by clicking dropdown as a result of that we will be able to see a presentation of the icon on the right side.
Let’s search for the alarm icon.
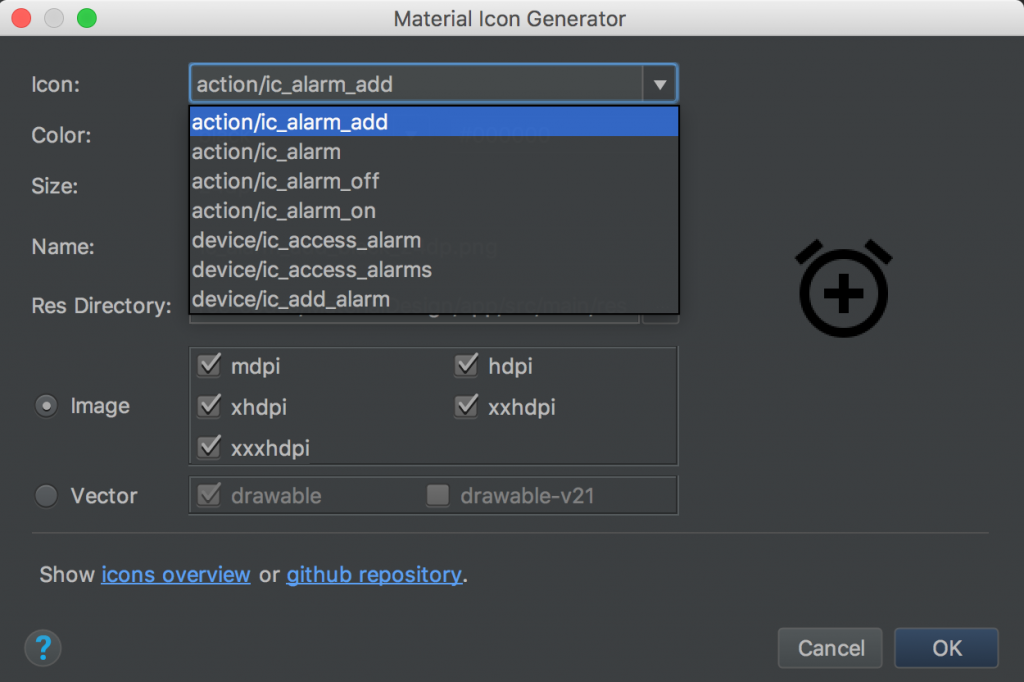
So as we can see I started searching for alarm icons and it shows me all alarm-related icons. Now I can choose the alarm icon according to my requirements.
Recommended: Android Login and Signup using PHP MySQL.
4. Icon Color
Icon color is one the most important factor for the apps as we need to follow a specific color scheme for each application. By using this material design plugin it’s, even more, easier to change the colors of the icons. We can choose to give colors in drop-down or even we can add our own hexadecimal color codes. As a result of both options, we will have icons with exact colors.
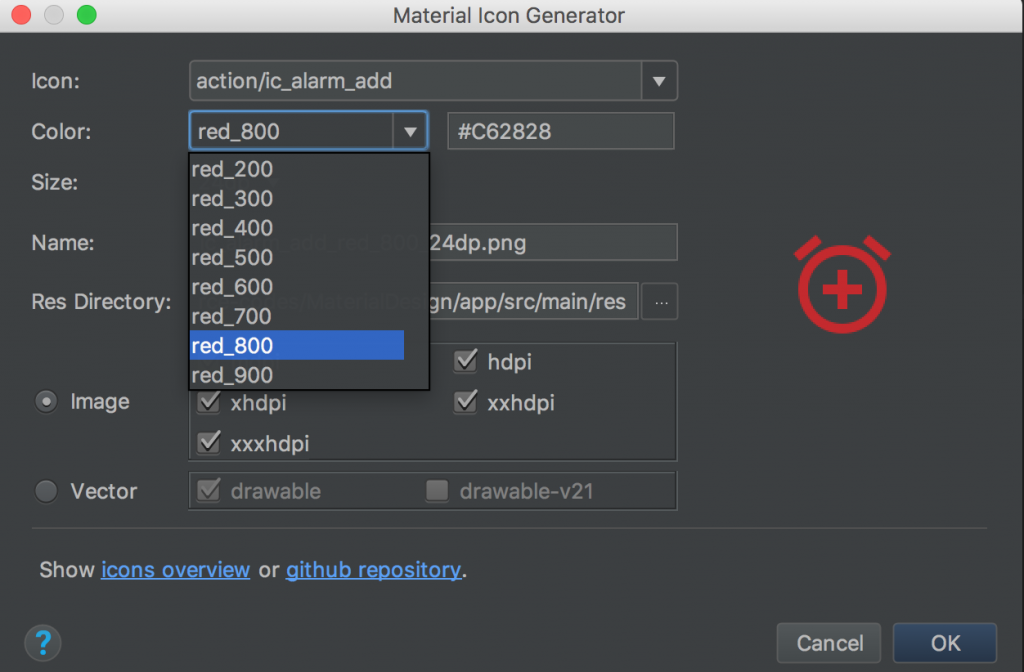
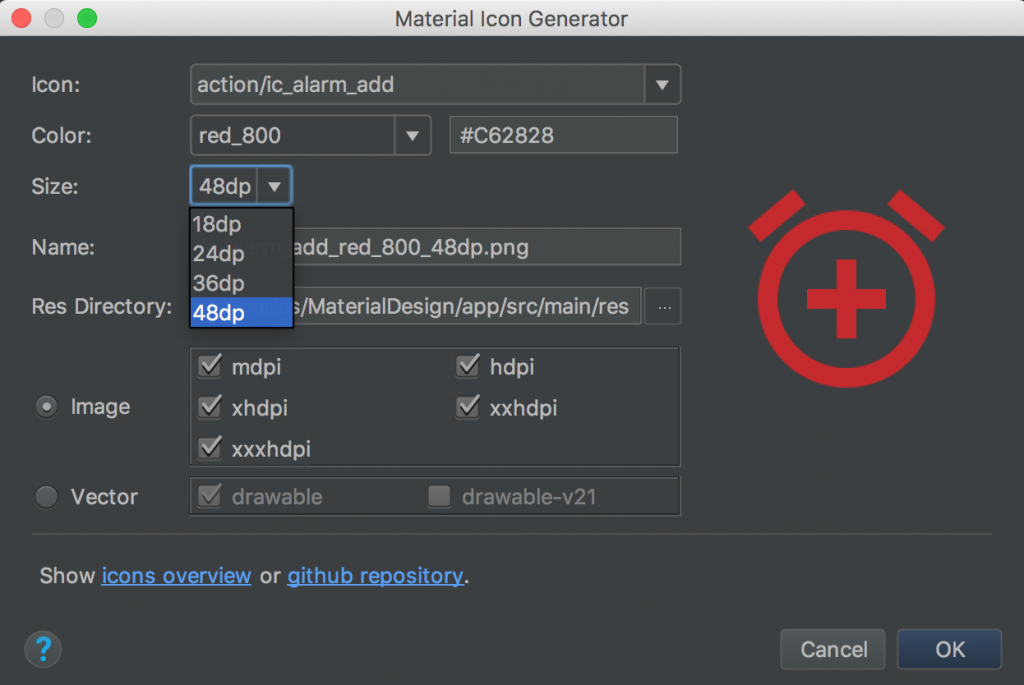
5. Icon Size
Icon size is also one of the most important factors therefore this option is also added to this plugin. We can choose icons between 18dp, 24dp, 36dp, or 48dp as per our own needs.
6. Icon Name
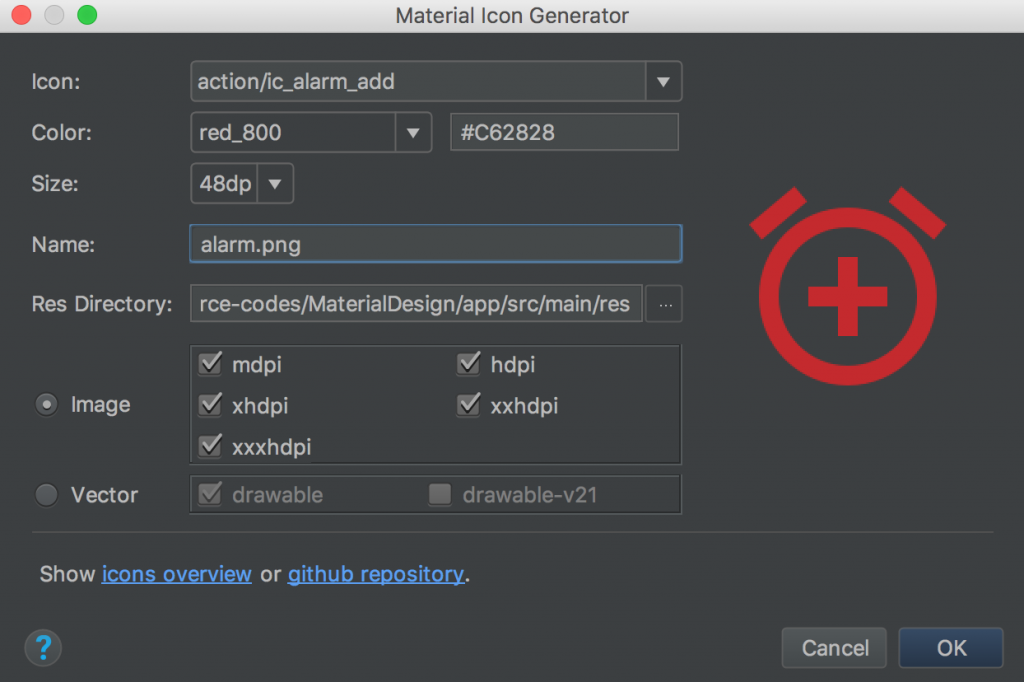
Due to color, size, and names icons are automatically named but we can change names also by just clicking in the name section. Certainly, this name will be the icon name in the drawable folder.
6. Res Directory
We can choose our desired location for created icons. By default, icons are saved in a drawable folder under res.
7. Image / Vector Type
We have the flexibility of creating an image or vector as an XML file of the icons. Vectors are easy to maintain for various resolutions.
Finally, after completing all the steps we can just click on ok and icons will be saved under the drawables folder.
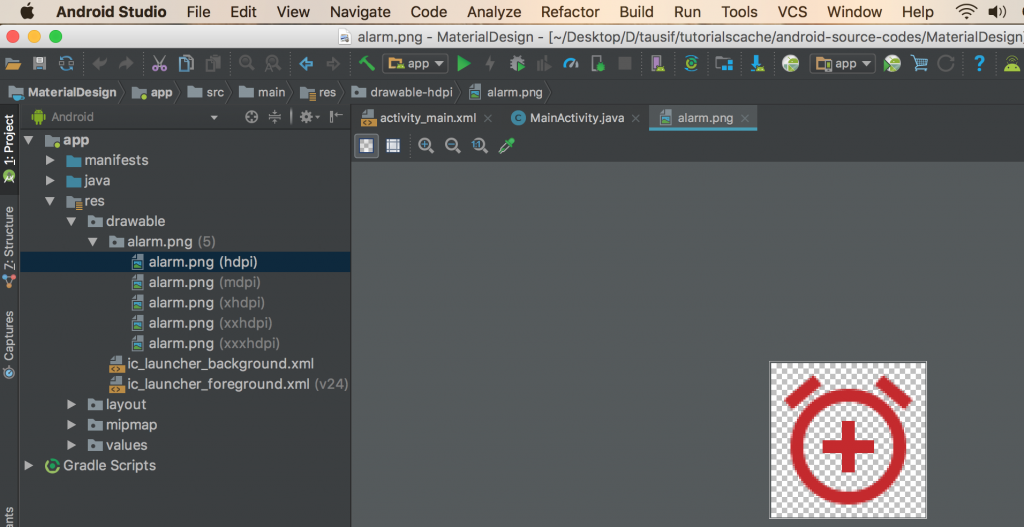
Now we can use this icon in XML and in java files dynamically as well. Let’s try with an XML file. Add the following code to your colors.xml file.
<?xml version="1.0" encoding="utf-8"?>
<resources>
    <color name="colorPrimary">#d11617</color>
    <color name="colorPrimaryDark">#B31718</color>
    <color name="colorAccent">#FF4081</color>
</resources>
8. activity_main.xml
To display the icon we need an image view and just for the icon name, we have added a textview in XML file of MainActivity.
<?xml version="1.0" encoding="utf-8"?>
<RelativeLayout xmlns:android="http://schemas.android.com/apk/res/android"
    xmlns:app="http://schemas.android.com/apk/res-auto"
    xmlns:tools="http://schemas.android.com/tools"
    android:layout_width="match_parent"
    android:layout_height="match_parent"
    tools:context="com.tutorialscache.materialdesign.MainActivity">
    <TextView
        android:text="Alarm Icon"
        android:layout_marginTop="100dp"
        android:gravity="center_horizontal"
        android:textColor="@color/colorPrimary"
        android:textSize="25dp"
        android:layout_width="match_parent"
        android:layout_height="wrap_content" />
    <ImageView
        android:src="@drawable/alarm"
        android:layout_centerVertical="true"
        android:layout_centerHorizontal="true"
        android:layout_width="wrap_content"
        android:layout_height="wrap_content" />
</RelativeLayout>
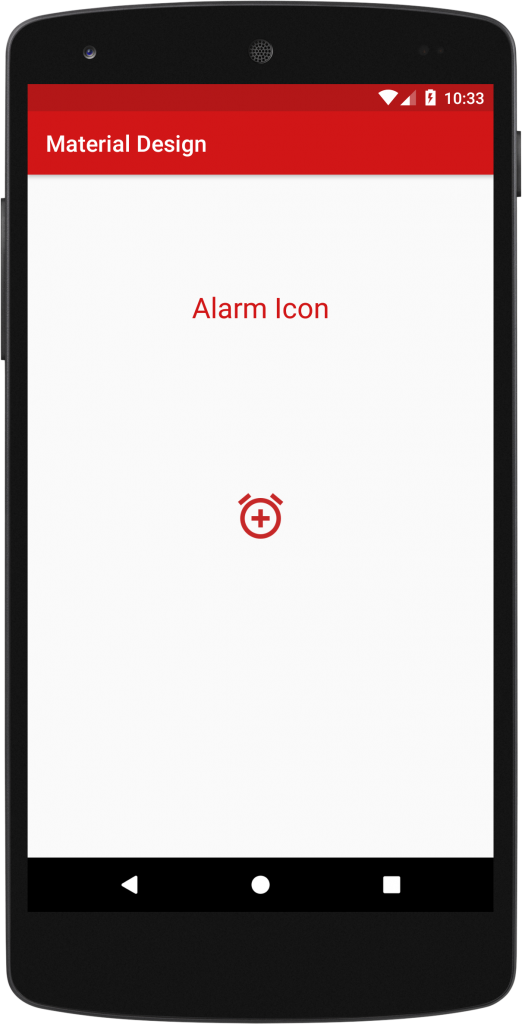
Hence we will have an output with an icon image on ImageView.


Comments are closed.