
Custom ListView is the backbone of android application development. When it comes to showing multiple items like images, text and buttons we must need customized solution. Custom ListView BaseAdapter makes it possible to show multiple views to be displayed. In this tutorial, we will learn to make a ListView with images of countries, names, populations, and areas.
1. activity_main.xml
Add a Custom ListView using BaseAdapter inside activity_main.xml and assign id listView.
<?xml version="1.0" encoding="utf-8"?>
<LinearLayout
    xmlns:android="http://schemas.android.com/apk/res/android"
    xmlns:app="http://schemas.android.com/apk/res-auto"
    xmlns:tools="http://schemas.android.com/tools"
    android:layout_width="match_parent"
    android:layout_height="match_parent"
    tools:context="com.tutorialscache.customlistview.MainActivity"
    android:background="#e9e9e9">
    <ListView
        android:id="@+id/listView"
        android:layout_width="match_parent"
        android:layout_height="wrap_content">
    </ListView>
</LinearLayout>
2. Custom Row country_row.xml
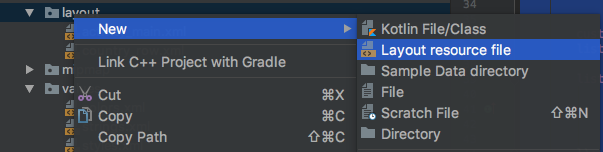
Right-click on layout and create a new > Layout Resource File. This row will be used by the adapter to render each country item.
<?xml version="1.0" encoding="utf-8"?>
<RelativeLayout
    xmlns:android="http://schemas.android.com/apk/res/android"
    android:layout_width="match_parent"
    android:layout_height="wrap_content"
    android:padding="10dp"
    android:background="#f7f7f7">
    <ImageView
        android:padding="2dp"
        android:id="@+id/countryFlagIv"
        android:scaleType="fitXY"
        android:layout_width="100dp"
        android:layout_height="80dp" />
    <TextView
        android:id="@+id/countryNameTv"
        android:layout_toRightOf="@+id/countryFlagIv"
        android:layout_marginLeft="10dp"
        android:textSize="22dp"
        android:textStyle="bold"
        android:textColor="#000"
        android:layout_width="wrap_content"
        android:layout_height="wrap_content" />
    <TextView
        android:id="@+id/populationTv"
        android:text=""
        android:textColor="@color/colorPrimary"
        android:layout_marginLeft="10dp"
        android:layout_toRightOf="@+id/countryFlagIv"
        android:layout_below="@id/countryNameTv"
        android:layout_width="wrap_content"
        android:layout_height="wrap_content" />
    <TextView
        android:id="@+id/areaTv"
        android:text=""
        android:textColor="#000"
        android:layout_marginLeft="10dp"
        android:layout_alignParentRight="true"
        android:layout_below="@id/populationTv"
        android:layout_width="wrap_content"
        android:layout_height="wrap_content" />
</RelativeLayout>
3. create model CountriesModel.java
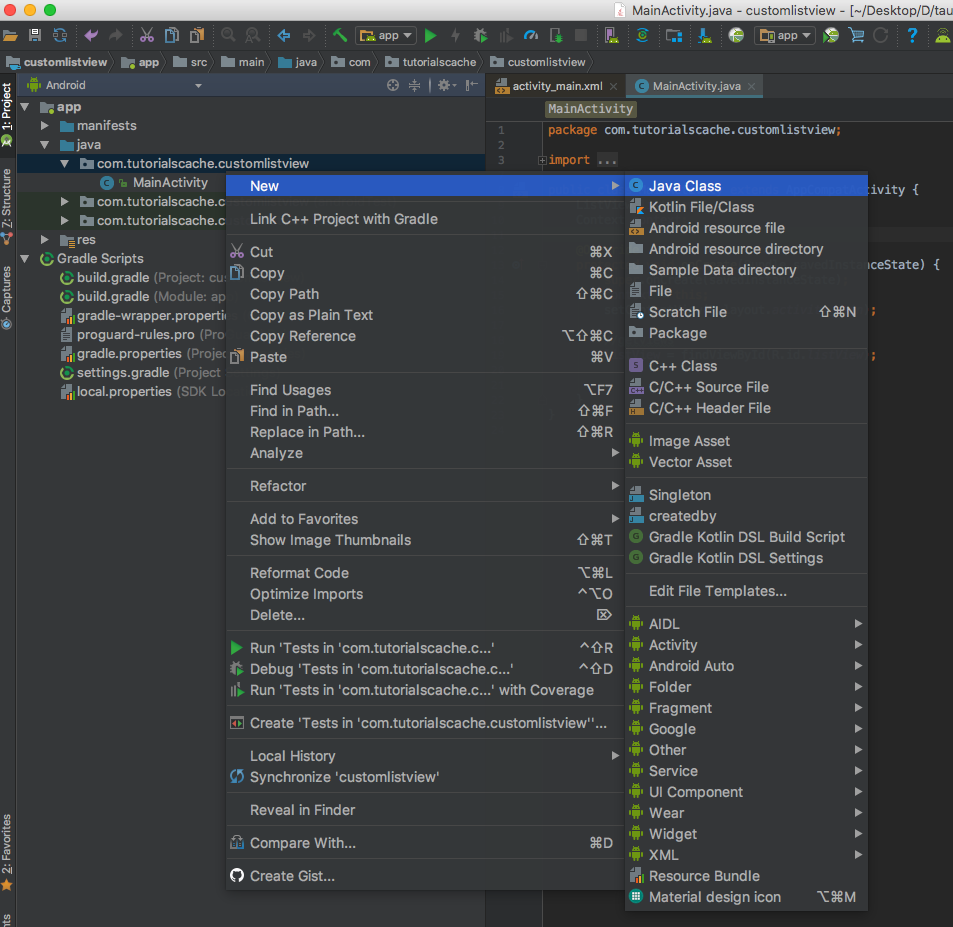
3.1 Right-click on the Package name > New > Java Class and give model name CountriesModel and click Ok.
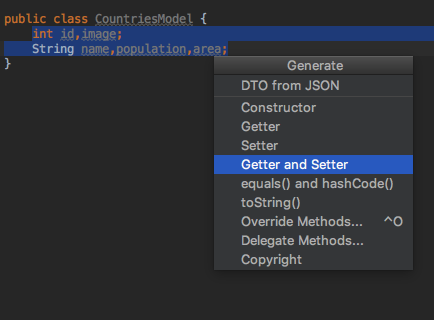
3.2 Create Getters and Setters
package com.tutorialscache.customlistview;
public class CountriesModel {
    int id,image;
    String name;
    String population;
    String area;
    public int getId() {
        return id;
    }
    public void setId(int id) {
        this.id = id;
    }
    public int getImage() {
        return image;
    }
    public void setImage(int image) {
        this.image = image;
    }
    public String getName() {
        return name;
    }
    public void setName(String name) {
        this.name = name;
    }
    public String getPopulation() {
        return population;
    }
    public void setPopulation(String population) {
        this.population = population;
    }
    public String getArea() {
        return area;
    }
    public void setArea(String area) {
        this.area = area;
    }
}
4. CustomAdapter.java
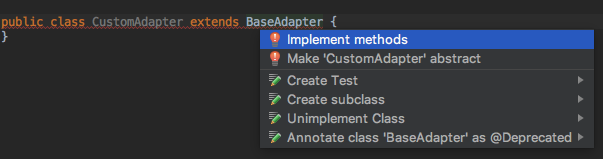
Create new java class and name as CustomAdapter by clicking on package name > New > Java Class. Extend with BaseAdapter following cmd+insert to implement methods.
Full CustomAdapter.java code.
package com.tutorialscache.customlistview;
import android.content.Context;
import android.view.LayoutInflater;
import android.view.View;
import android.view.ViewGroup;
import android.widget.BaseAdapter;
import android.widget.ImageView;
import android.widget.TextView;
import java.util.ArrayList;
public class CustomAdapter extends BaseAdapter {
    Context context;
    ArrayList<CountriesModel> countriesData;
    LayoutInflater layoutInflater;
    CountriesModel countriesModel;
    public CustomAdapter(Context context, ArrayList<CountriesModel> countriesData) {
        this.context = context;
        this.countriesData = countriesData;
        layoutInflater = (LayoutInflater) context.getSystemService(Context.LAYOUT_INFLATER_SERVICE);
    }
    @Override
    public int getCount() {
        return countriesData.size();
    }
    @Override
    public Object getItem(int i) {
        return countriesData.get(i);
    }
    @Override
    public long getItemId(int i) {
        return countriesData.get(i).getId();
    }
    @Override
    public View getView(int position, View view, ViewGroup viewGroup) {
        View rowView = view;
        if (rowView==null) {
            rowView = layoutInflater.inflate(R.layout.country_row, null, true);
        }
            //link views
            ImageView countryFlagIv = rowView.findViewById(R.id.countryFlagIv);
            TextView countryNameTv = rowView.findViewById(R.id.countryNameTv);
            TextView populationTv = rowView.findViewById(R.id.populationTv);
            TextView areaTv = rowView.findViewById(R.id.areaTv);
            countriesModel = countriesData.get(position);
            countryFlagIv.setImageResource(countriesModel.getImage());
            countryNameTv.setText(countriesModel.getName());
            populationTv.setText("Population : " + countriesModel.getPopulation());
            areaTv.setText("Area : " + countriesModel.getArea());
        return rowView;
    }
}
5. MainActivity.java
package com.tutorialscache.customlistview;
import android.content.Context;
import android.support.v7.app.AppCompatActivity;
import android.os.Bundle;
import android.view.View;
import android.widget.AdapterView;
import android.widget.ListView;
import android.widget.Toast;
import java.util.ArrayList;
public class MainActivity extends AppCompatActivity {
    ListView listView;
    Context context;
    ArrayList<CountriesModel> countriesData;
    CustomAdapter customAdapter;
    CountriesModel countriesModel;
    @Override
    protected void onCreate(Bundle savedInstanceState) {
        super.onCreate(savedInstanceState);
        context = this;
        setContentView(R.layout.activity_main);
        //getviews
        listView = findViewById(R.id.listView);
        countriesData = new ArrayList<>();
        //add Countries Data
        populateCountriesData();
        customAdapter = new CustomAdapter(context,countriesData);
        listView.setAdapter(customAdapter);

        listView.setOnItemClickListener(new AdapterView.OnItemClickListener() {
            @Override
            public void onItemClick(AdapterView<?> adapterView, View view, int position, long l) {
                Toast.makeText(context,countriesData.get(position).getName(),Toast.LENGTH_SHORT).show();
            }
        });
    }
    private void populateCountriesData() {
        //country 1
        countriesModel = new CountriesModel();
        countriesModel.setId(1);
        countriesModel.setName("Pakistan");
        countriesModel.setImage(R.drawable.pakistan);
        countriesModel.setArea("796,095 km2");
        countriesModel.setPopulation("203,382,058");
        countriesData.add(countriesModel);
        //country 2
        countriesModel = new CountriesModel();
        countriesModel.setId(2);
        countriesModel.setName("Afghanistan");
        countriesModel.setImage(R.drawable.afghanistan);
        countriesModel.setArea("652,090 km2");
        countriesModel.setPopulation("25,500,100");
        countriesData.add(countriesModel);
        //country 3
        countriesModel = new CountriesModel();
        countriesModel.setId(1);
        countriesModel.setName("India");
        countriesModel.setImage(R.drawable.india);
        countriesModel.setArea("3,287,260 km2");
        countriesModel.setPopulation("1,241,610,000");
        countriesData.add(countriesModel);
        //country 4
        countriesModel = new CountriesModel();
        countriesModel.setId(1);
        countriesModel.setName("Iran");
        countriesModel.setImage(R.drawable.iran);
        countriesModel.setArea("1,648,200 km2");
        countriesModel.setPopulation("77,288,000");
        countriesData.add(countriesModel);
        //country 5
        countriesModel = new CountriesModel();
        countriesModel.setId(1);
        countriesModel.setName("China");
        countriesModel.setImage(R.drawable.china);
        countriesModel.setArea("9,640,820 km2");
        countriesModel.setPopulation("1,363,350,000");
        countriesData.add(countriesModel);
        //country 6
        countriesModel = new CountriesModel();
        countriesModel.setId(1);
        countriesModel.setName("United States");
        countriesModel.setImage(R.drawable.usa);
        countriesModel.setArea("9,629,090 km2");
        countriesModel.setPopulation("317,706,000");
        countriesData.add(countriesModel);
        //country 7
        countriesModel = new CountriesModel();
        countriesModel.setId(1);
        countriesModel.setName("Canada");
        countriesModel.setImage(R.drawable.canada);
        countriesModel.setArea("9,970,610 km2");
        countriesModel.setPopulation("35,295,770");
        countriesData.add(countriesModel);
        //country 8
        countriesModel = new CountriesModel();
        countriesModel.setId(1);
        countriesModel.setName("Morocco");
        countriesModel.setImage(R.drawable.morocco);
        countriesModel.setArea("446,550 km2");
        countriesModel.setPopulation("33,202,300");
        countriesData.add(countriesModel);
        //country 9
        countriesModel = new CountriesModel();
        countriesModel.setId(1);
        countriesModel.setName("South Africa");
        countriesModel.setImage(R.drawable.southafrica);
        countriesModel.setArea("1,221,040 km2");
        countriesModel.setPopulation("52,981,991");
        countriesData.add(countriesModel);
        //country 10
        countriesModel = new CountriesModel();
        countriesModel.setId(1);
        countriesModel.setName("Zimbabwe");
        countriesModel.setImage(R.drawable.zimbabwe);
        countriesModel.setArea("390,757 km2");
        countriesModel.setPopulation("12,973,808");
        countriesData.add(countriesModel);
    }
}
Recommended: Android SQLite Tutorial.


