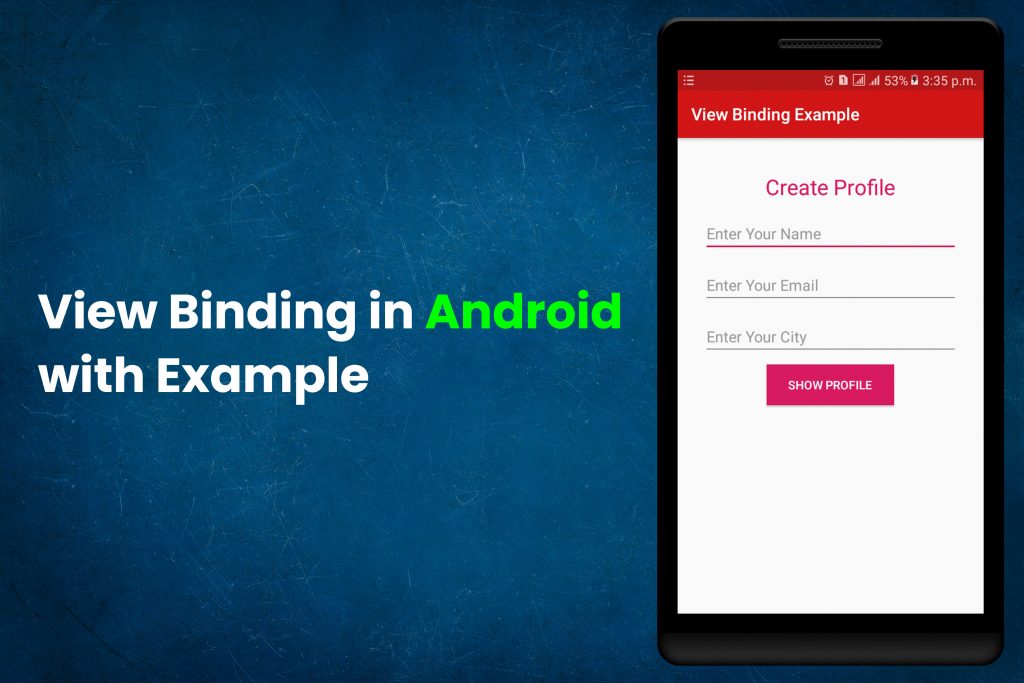
As android developers, we use FindViewById() in our Activity and Fragment. It is important to access every view in the layout.xml file to our activity class. As a result, this added a lot of code in our activity class. Moreover, it causes our class to become more complex and difficult to maintain. Therefore, view binding is the finest way to get rid of using FindViewById() in our activity class. Above all, it reduces the amount of code.
In conclusion, view binding solved some previous issues like :
- Null Pointer Exception due to an invalid view id.
- Class Casting Exception due to miss match in different types of views.
- Improving the speed and performance of our application.
Related: MVVM Design Pattern in Android.
1. App name, Package name and Project location.
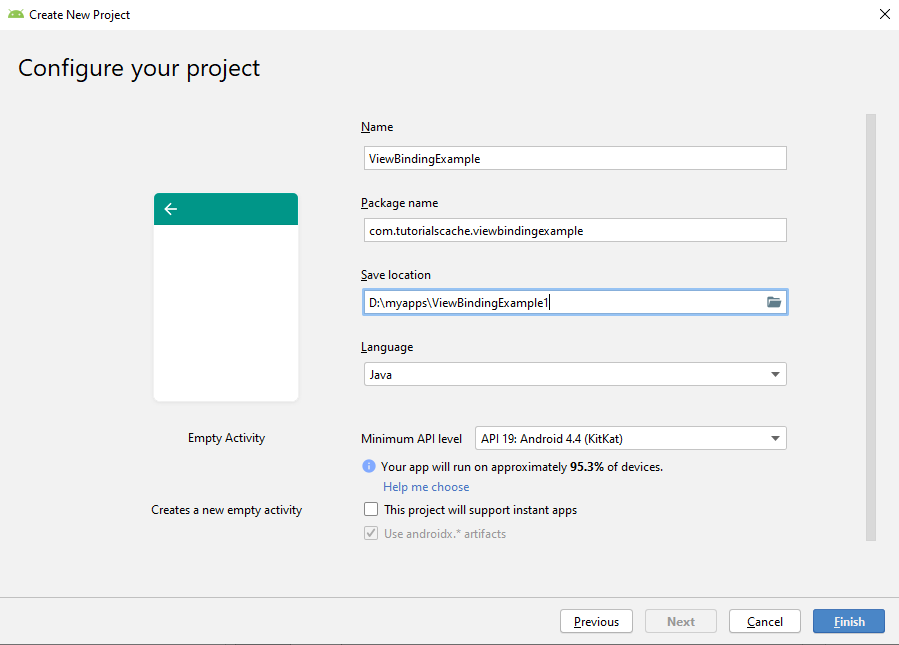
Firstly, we will create a new project with the name ViewBindingExample. After that, we will also give the package name like com.tutorialscache.viewbindingexample.
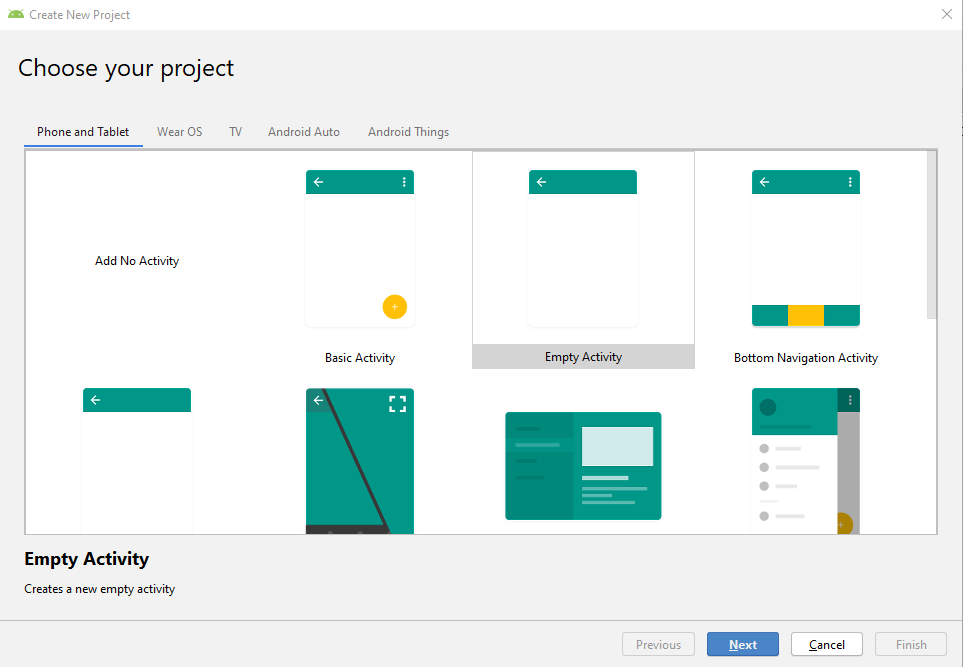
2. Choose Empty Activity
In this choose project window, there are so many templates for different types of activities. But we will choose the empty activity for now.
3. Setup Instructions
3.1 Changes in Build.Gradle(Module:app) File.
Firstly, we will enable viewBinding in our build.Gradle() file. It is done by enabling dataBinding by setting it to true inside the android tag. As a result, it will automatically generate a binding class for each layout.xml file.
Enable ViewBinding.
  //add these lines to build.gradle file
android{
        dataBinding
        {
            enabled=true;
        }
    }
3.2 Changes in activity_main.xml file.
Secondly, we will add a layout tag in our activity_main.xml file. Moreover, we will remove all the namespaces from RelativeLayout and add them all to the layout tag. As a result, it will generate a binding class by adding ‘Binding‘ keyword at the end. In conclusion, ActivityMainBinding class is automatically generated for activity_main.xml file.
<?xml version="1.0" encoding="utf-8"?>
<layout xmlns:android="http://schemas.android.com/apk/res/android"
    xmlns:tools="http://schemas.android.com/tools">
<RelativeLayout
    android:layout_width="match_parent"
    android:layout_height="match_parent"
    tools:context="com.tutorialscache.viewbindingexample.MainActivity">
</RelativeLayout>
</layout>
3.3 Changes in MainActivity.java Class.
At last, we will initialize the data binding object. For this, we will use DataBindingUtil in the onCreate method. After that, the binding object will be used to access all views directly.
public class MainActivity extends AppCompatActivity {
    ActivityMainBinding binding;
    @Override
    protected void onCreate(Bundle savedInstanceState) {
        super.onCreate(savedInstanceState);
        binding = DataBindingUtil.setContentView(this, R.layout.activity_main);
    }
}
4. Final activity_main.xml
In here, full code for activity_main.xml is given.
<?xml version="1.0" encoding="utf-8"?>
<layout xmlns:android="http://schemas.android.com/apk/res/android"
    xmlns:tools="http://schemas.android.com/tools">
<RelativeLayout
    android:layout_width="match_parent"
    android:layout_height="match_parent"
    tools:context="com.tutorialscache.viewbindingexample.MainActivity">
    <TextView
        android:layout_height="wrap_content"
        android:layout_width="wrap_content"
        android:text="@string/create_profile"
        android:layout_marginTop="40dp"
        android:textSize="25sp"
        android:textColor="@color/colorAccent"
        android:layout_centerHorizontal="true"
        android:id="@+id/createprofile_txt" />
    <EditText
        android:id="@+id/nameEdit"
        android:layout_below="@id/createprofile_txt"
        android:layout_marginTop="15dp"
        android:inputType="textPersonName"
        android:hint="Enter Your Name"
        android:layout_width="300dp"
        android:layout_centerHorizontal="true"
        android:layout_height="wrap_content" />
    <EditText
        android:id="@+id/emailEdit"
        android:layout_below="@id/nameEdit"
        android:hint="Enter Your Email"
        android:layout_marginTop="15dp"
        android:inputType="textEmailAddress"
        android:layout_width="300dp"
        android:layout_centerHorizontal="true"
        android:layout_height="wrap_content" />
    <EditText
        android:id="@+id/cityEdit"
        android:layout_below="@id/emailEdit"
        android:layout_marginTop="15dp"
        android:inputType="text"
        android:hint="Enter Your City"
        android:layout_width="300dp"
        android:layout_centerHorizontal="true"
        android:layout_height="wrap_content"
        />
    <Button android:id="@+id/button"
        android:layout_below="@id/cityEdit"
        android:layout_height="wrap_content"
        android:text="Show Profile"
        android:textColor="#ffff"
        android:background="@color/colorAccent"
        android:layout_marginTop="10dp"
        android:layout_centerHorizontal="true"
        android:layout_width="150dp" />
    <TextView
        android:id="@+id/nameTv"
        android:layout_height="wrap_content"
        android:layout_width="wrap_content"
        android:layout_marginTop="20dp"
        android:layout_below="@id/button"
        android:textSize="15sp"
        android:layout_centerHorizontal="true" />
    <TextView
        android:layout_height="wrap_content"
        android:layout_width="wrap_content"
        android:layout_marginTop="10dp"
        android:layout_below="@id/nameTv"
        android:textSize="15sp"
        android:layout_centerHorizontal="true"
        android:id="@+id/emailTv" />
    <TextView
        android:layout_height="wrap_content"
        android:layout_width="wrap_content"
        android:layout_below="@id/emailTv"
        android:layout_marginTop="10dp"
        android:textSize="15sp"
        android:layout_centerHorizontal="true"
        android:id="@+id/cityTv" />
</RelativeLayout>
</layout>
5. Final MainActivity.java
In here, full code for MainActivity.java is given.
package com.tutorialscache.viewbindingexample;
import androidx.appcompat.app.AppCompatActivity;
import androidx.databinding.DataBindingUtil;
import android.graphics.Color;
import android.os.Bundle;
import android.view.View;
import android.widget.Button;
import android.widget.Toast;
import com.tutorialscache.viewbindingexample.databinding.ActivityMainBinding;
public class MainActivity extends AppCompatActivity {

    String name,email,city;
    ActivityMainBinding binding;
    @Override
    protected void onCreate(Bundle savedInstanceState) {
        super.onCreate(savedInstanceState);
        binding = DataBindingUtil.setContentView(this,R.layout.activity_main);
        /*adding click listner to Button by using binding object with id button
         *which we added in layout file
         */
        binding.button.setOnClickListener(new View.OnClickListener() {
            @Override
            public void onClick(View v) {
                /*retreiving the input from edittext and setting it to given
                 *stings for further use
                 */
                name=binding.nameEdit.getText().toString();
                email=binding.emailEdit.getText().toString();
                city=binding.cityEdit.getText().toString();
                //check if values of strings are empty if empty then show toast
                if (name.isEmpty()||email.isEmpty()||city.isEmpty())
                {
                   Toast.makeText(MainActivity.this,"EmptyFields",Toast.LENGTH_SHORT).show();
                }
                // if not then set textviews to given strings
                else {
                    binding.nameTv.setText("Your Name: " + name);
                    binding.emailTv.setText("Your Email: " + email);
                    binding.cityTv.setText("Your City: " + city);
                }
            }
        });
    }
}

