
Switch between View Controllers is one of the basic and important part of almost every application. In this tutorial, you will learn to switch between View Controllers programmatically. Before getting started, you need to have a basic idea of ios development and layout design.
We will go step by step so you can understand and implement it easily. Moreover, this tutorial also has a complete source code at the end so you can download and use it.
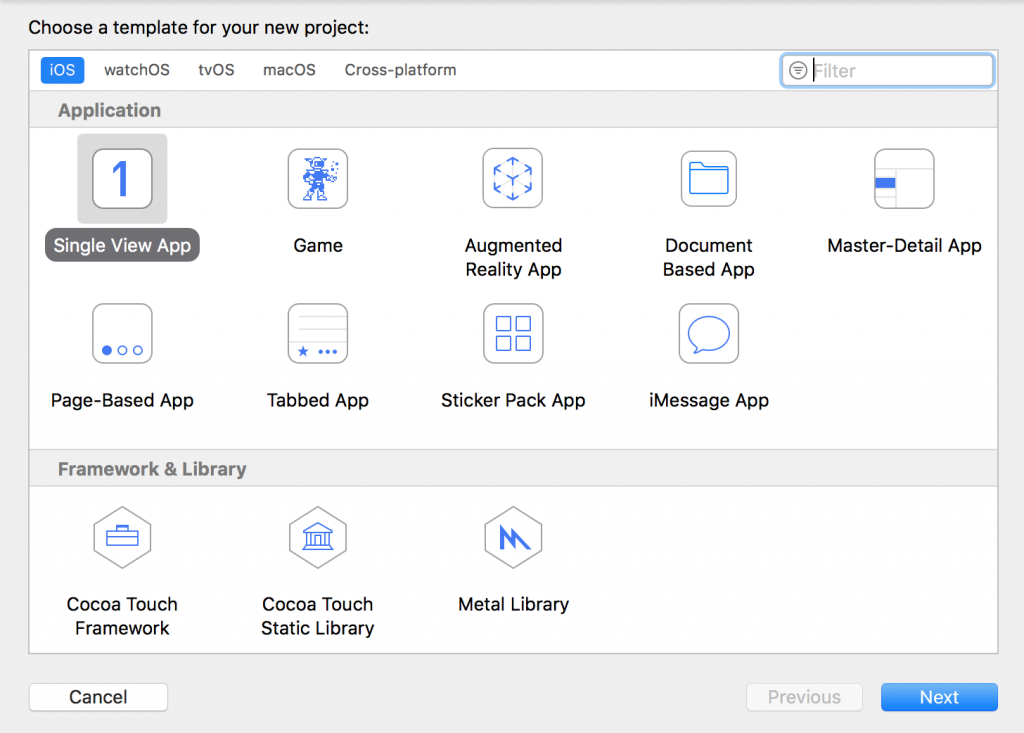
1. Create a new Xcode project.
Open Xcode and click on Create a new Xcode project.

Choose a Single View Application
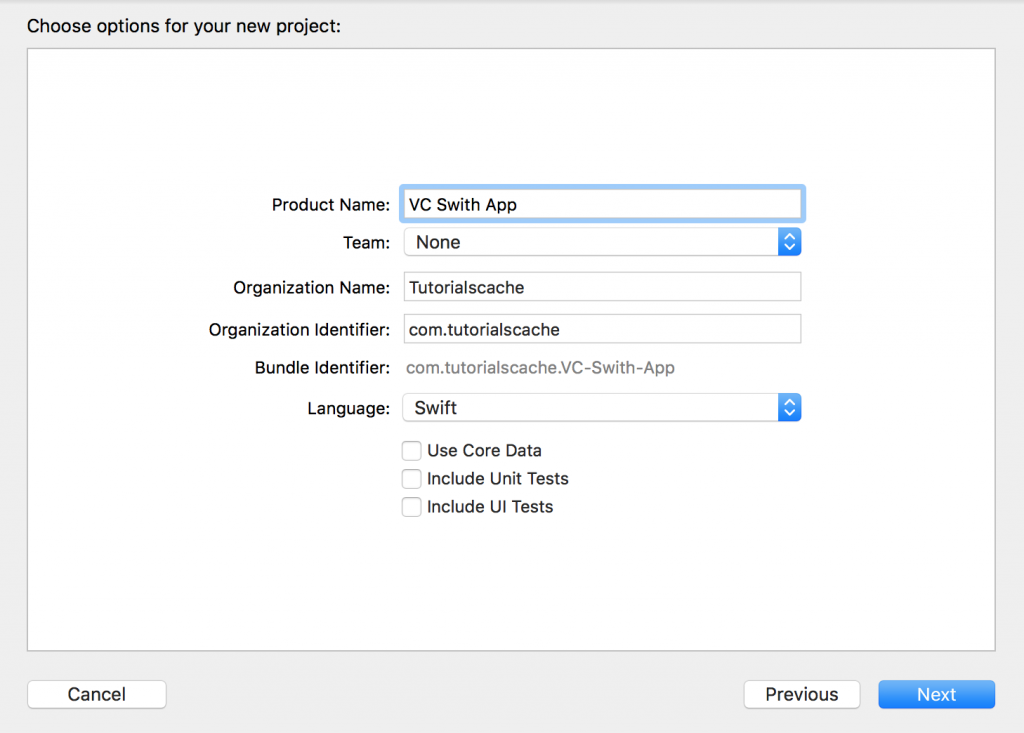
Enter details for the application including app name and organization name.
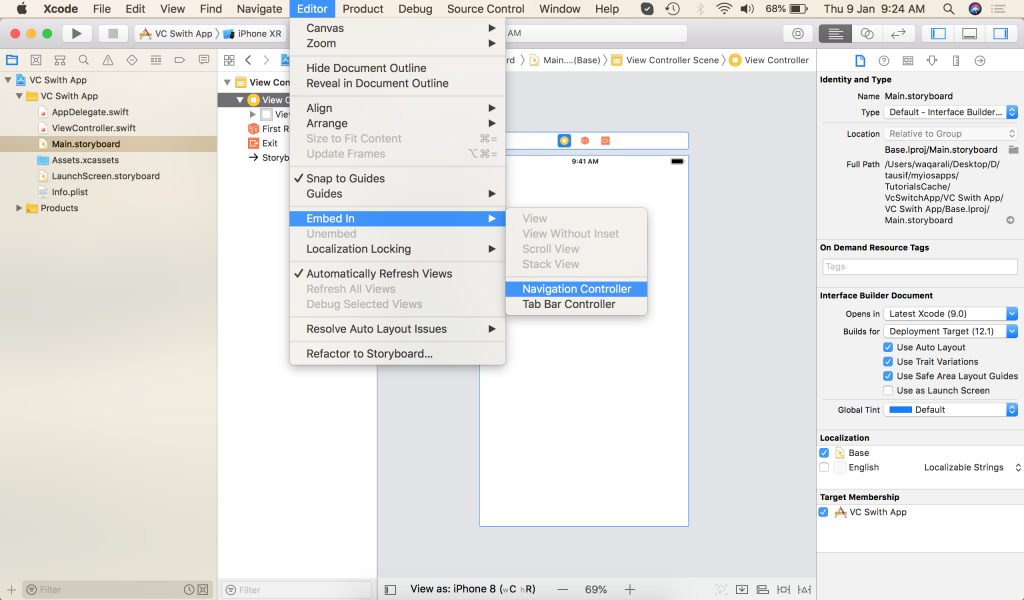
Click on Main. storyboard and select View Controller. Now we need to embed Navigation Controller which will work as a container to manage child view controllers.
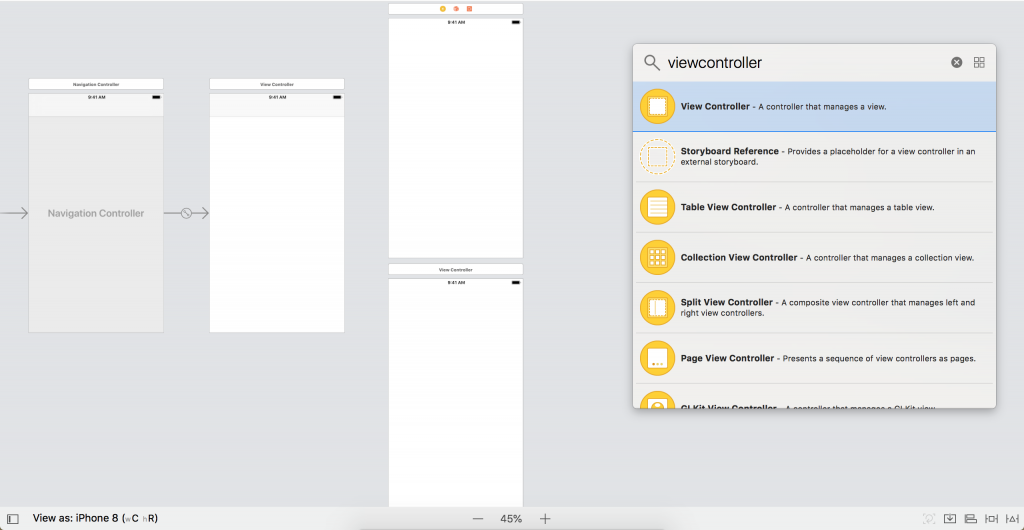
3. Add new View Controllers to Main.storyboard
Open object library (shift-command-L) and drag-drop two view controllers on storyboard. We will use these view controllers for navigation.
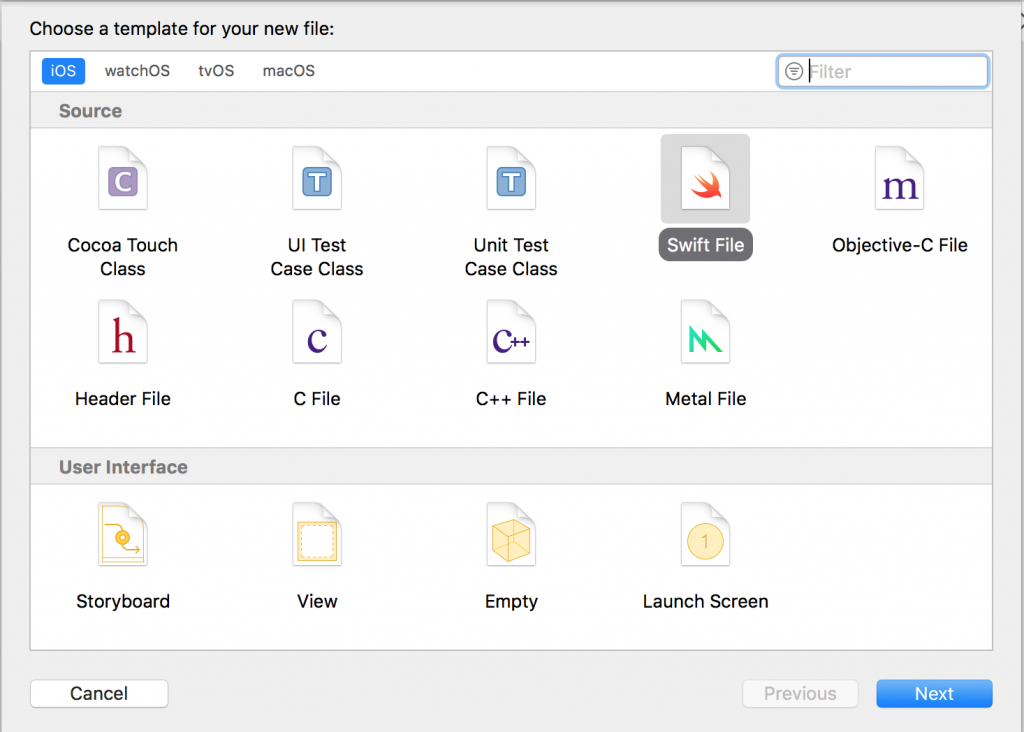
4. Create New Swift Files.
Now we need to create two new Swift files by pressing (command+N) and name them as
- FirstController.swift
- SecondController.swift
Add the following codes in your swift files accordingly.
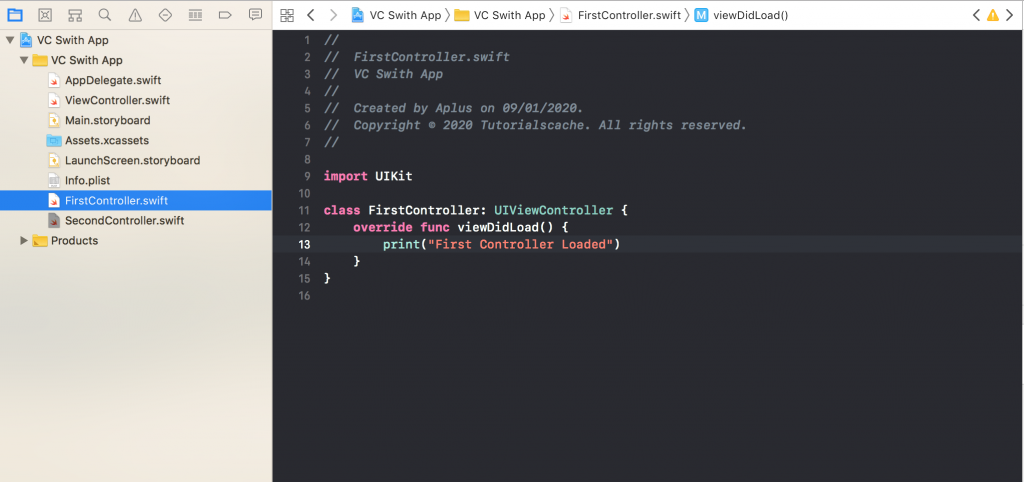
4.1 FirstController.swift
//  FirstController.swift
import UIKit
class FirstController: UIViewController {
    override func viewDidLoad() {
        print("First Controller Loaded")
    }
}
4.2 SecondController.swift
//  SecondController.swift
//  VC Swith App
import UIKit
class SecondController: UIViewController {
    override func viewDidLoad() {
        print("second VC Loaded")
    }
}
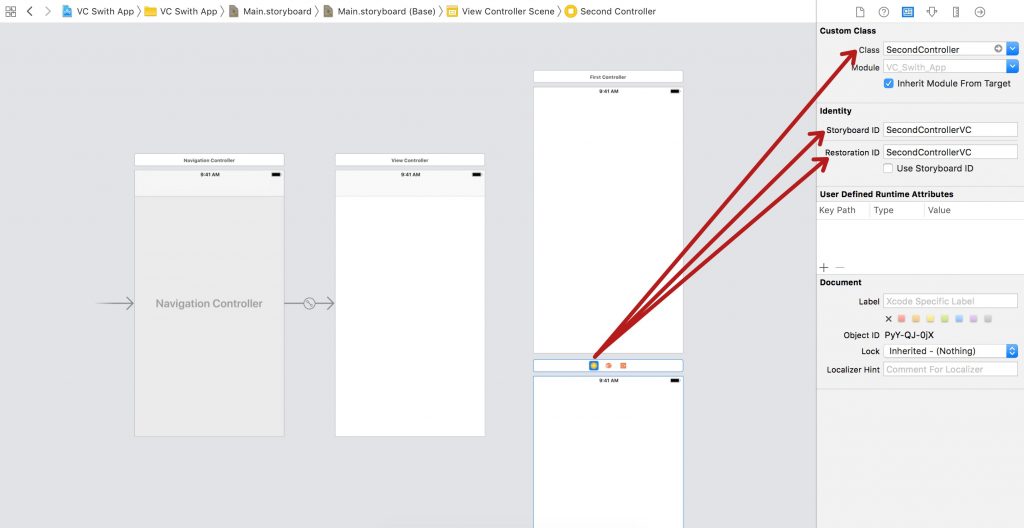
5. Storyboard ID under Identity Inspector
Now we need to assign storyboard ids to our view controller scenes. So firstly, open the storyboard so we can select the view controller as shown in the picture below. Secondly, add a storyboard id with also a custom class that we have already created. As a result, we will be able to access view controllers from the storyboard.
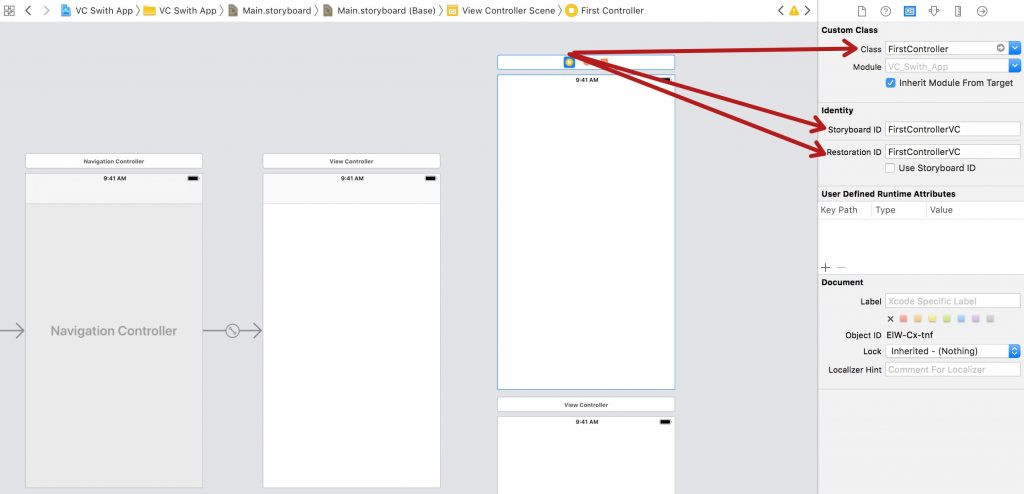
After that, you need to assign storyboard ids to both controllers.
Related: Things to Consider Before Creating an iOS App.
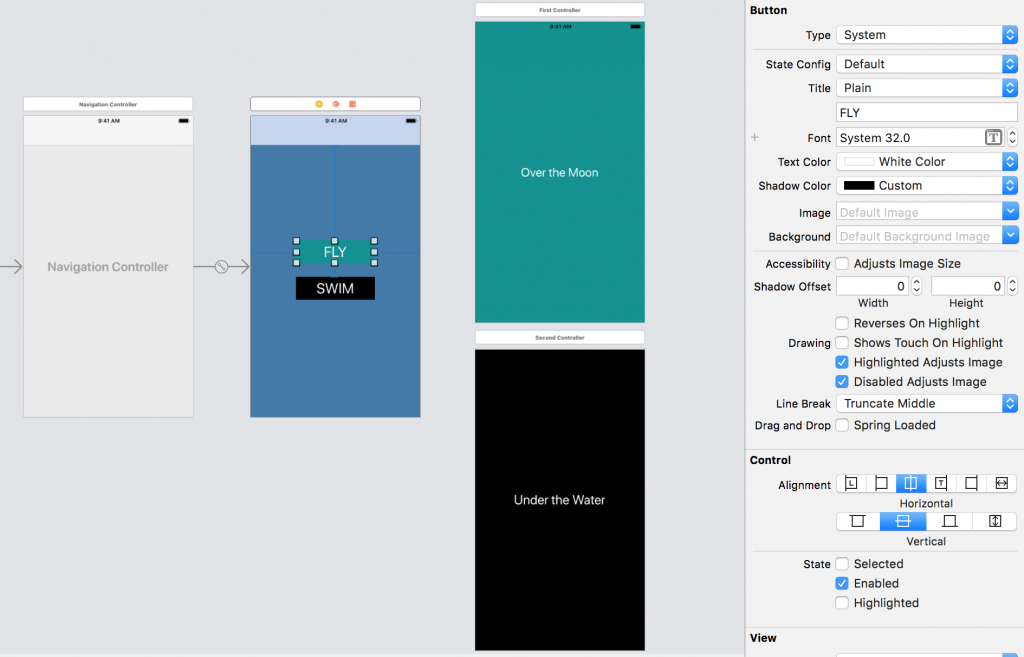
6. Buttons, Labels, and Backgrounds
After that, we need to add two buttons on the main view controllers so we can click on them and move to our first or second view controllers. You can also change backgrounds from the attributes inspector to make things pretty. Regarding constraints, you can simply align constraints vertically and horizontally center.
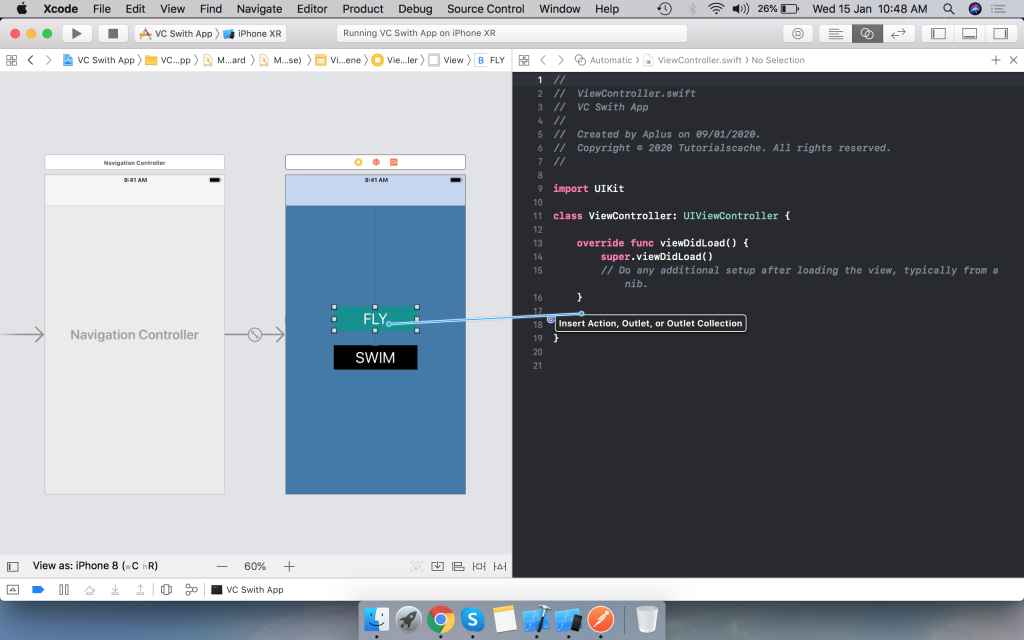
7. IBActions of Buttons
This is one of the important parts of the project. We need to add clicks on our fly and swim buttons. It’s also called tap action of UIButtons. You can follow step by step to complete this procedure.
- Click on Fly Button on Story Board
- Then click on Assistant Editor from the top right.
- After that, click on Fly Button and Ctrl+drag from it down to the space in your code
- Enter the name of the action as flyClick
- Click on connect
   @IBAction func flyClick(_ sender: Any) {
    }
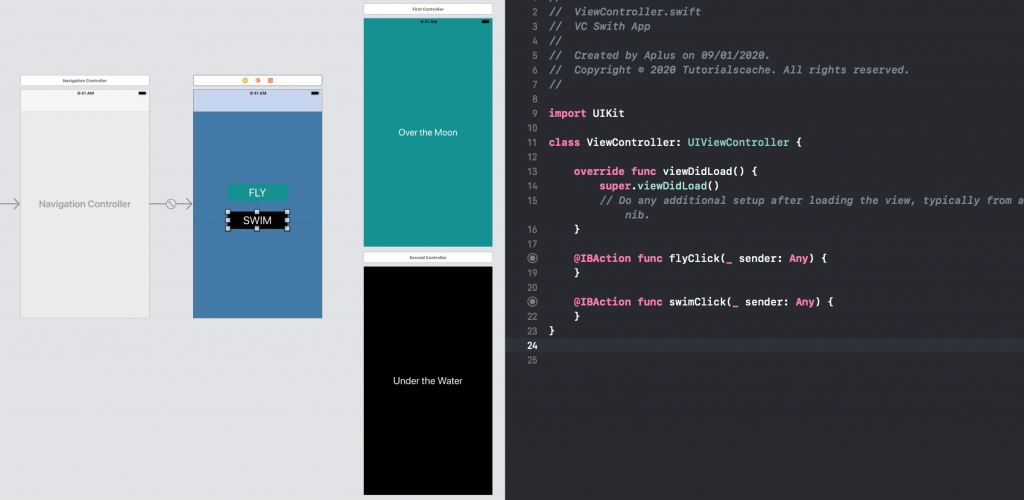
Similarly, repeat the steps for the swim button and add the swimClick function. The result of this final output will look like the below image.
8. Push View Controller
Once buttons are clicked, we need to add code so we can push our new video controllers and move to them. For this, we need to add the following lines of codes inside flyButton Click.
//Here is where we create an instance of our view controller. instantiateViewController(withIdentifier:) will create an instance of the view controller.
let firstVC = self.storyboard?.instantiateViewController(withIdentifier: "FirstControllerVC") as! FirstController
        self.navigationController?.pushViewController(firstVC, animated: true)
FirstController is our swift VC file and FirstControllerVC is our storyboard ID. We will also implement our swim button and this is what the whole ViewController.swift will look like.
//  ViewController.swift
//  Copyright © 2020 Tutorialscache. All rights reserved.
import UIKit
class ViewController: UIViewController {
    override func viewDidLoad() {
        super.viewDidLoad()
        // Do any additional setup after loading the view, typically from a nib.
    }
    @IBAction func flyClick(_ sender: Any) {
        let firstVC = self.storyboard?.instantiateViewController(withIdentifier: "FirstControllerVC") as! FirstController
        self.navigationController?.pushViewController(firstVC, animated: true)
    }

    @IBAction func swimClick(_ sender: Any) {
        let secondVC = self.storyboard?.instantiateViewController(withIdentifier: "SecondControllerVC") as! SecondController
        self.navigationController?.pushViewController(secondVC, animated: true)
    }

    // Hide Topbar
    override func viewWillAppear(_ animated: Bool) {
        super.viewWillAppear(animated)
        navigationController?.setNavigationBarHidden(true, animated: animated)
    }

    override func viewWillDisappear(_ animated: Bool) {
        super.viewWillDisappear(animated)
        navigationController?.setNavigationBarHidden(false, animated: animated)
    }
}


