
In the View Binding tutorial, we were limited to bind views of a layout file to the activity class to get rid of FindViewById(). However, Data Binding allows us to bind UI elements directly with the data source in the XML file itself. Moreover, it allows us to bind ClickListeners and handle events by directly referencing them by defining the data variable in the <layout> tag.
It is one of the finest android architectures recommended by android. In other words, it provides a way to tie the user interface(UI) with business logic allowing the UI values to update automatically without manual intervention. In this tutorial, we will learn how to implement Data Binding inside our application.
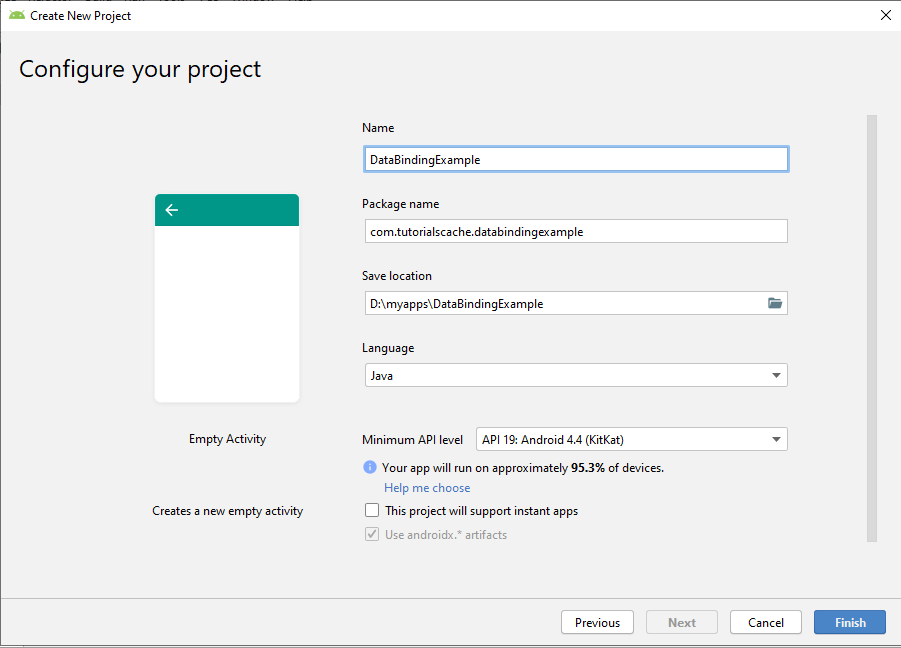
1. Create New Android Studio Project
Firstly, we will create a new project with the name DataBindingExample. After that, we will also give the package name like com.tutorialscache.databindingexample.
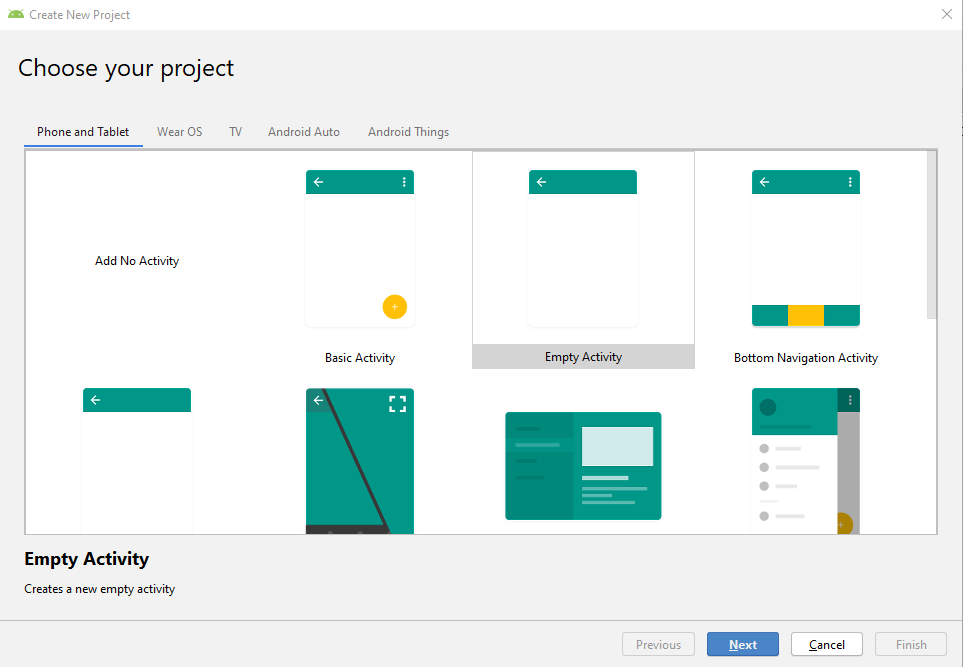
2. Choose Empty Activity.
In this chosen project window, there are so many templates for different types of activities. But we will choose the empty activity for now.
3. Setup Instruction
3.1 Changes in Build.Gradle(Module:app) File.
Firstly, we will enable dataBinding in our build.Gradle() file. It is done by enabling dataBinding by setting it to true inside the android tag. As a result, it will automatically generate a binding class for each layout.xml file.
Enable Data Binding.
  //add these lines to build.gradle file
android{
        dataBinding
        {
            enabled=true;
        }
    }
3.2 Changes in activity_main.xml file.
Inside our activity_main.xml, we will add a layout tag and remove the namespaces from RelativeLayout and add them all to the layout tag. In addition, this <layout>root will contain the normal view hierarchy but also include an <data>element. So, this data tag will define what data this layout will be bind to.
Therefore, for this example, we will make the necessary changes in the layout file as shown below.
<?xml version="1.0" encoding="utf-8"?>
<layout xmlns:android="http://schemas.android.com/apk/res/android"
    xmlns:tools="http://schemas.android.com/tools">
    <data>
        <variable
            name="..."
            type="..." />
    </data>
    <RelativeLayout
        android:layout_width="match_parent"
        android:layout_height="match_parent"
        tools:context="com.tutorialscache.databindingexample.MainActivity">
    </RelativeLayout>
</layout>
3.3 Changes in MainActivity.java Class.
After adding <layout> in an XML file, Android will automatically generate a class with the keyword “Binding” at the end and also convert it into a camel case. Such as, ActivityMainBinding Class is generated for the activity_main.xml file.
public class MainActivity extends AppCompatActivity {

    ActivityMainBinding binding;
    @Override
    protected void onCreate(Bundle savedInstanceState) {
        super.onCreate(savedInstanceState);
        binding = DataBindingUtil.setContentView(this, R.layout.activity_main);
    }
}
4. Define a Data Source.
Data Binding enables us binding data directly with the UI elements in the layout.xml file. Therefore, we will first create a simple Data Model class and name it as UserModel. In this UserModel class, we will define some member fields like name, email, city, etc.
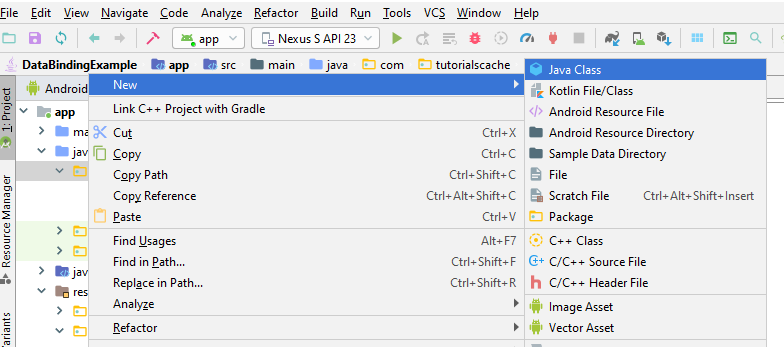
4.1 Right-click on the Package name > New > Java Class and give model name UserModel and click Ok.
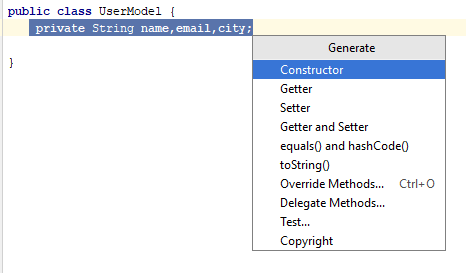
4.2 Create Getters and Setters.
In this UserModel class, we will create getters and setters. To do that, we will press Alt+Enter to generate getters and setters.
As a result, our final model class will look like this as given below.
package com.tutorialscache.databindingexample;
public class UserModel {
    private String name,email,city;
    public String getName() {
        return name;
    }
    public void setName(String name) {
        this.name = name;
    }
    public String getEmail() {
        return email;
    }
    public void setEmail(String email) {
        this.email = email;
    }
    public String getCity() {
        return city;
    }
    public void setCity(String city) {
        this.city = city;
    }
}
5. Adding Data Source to activity_main.xml file.
After creating the model class, we will define a variable and name it as a user in <variable> present in <data>. After that, we will define its type as ‘com.tutorialscache.databindingexample.UserModel’. This type is a key for the compiler to understand that all the member fields in the model class can be bind to UI elements. Since all fields of UserModel of type String can be bind directly with TextViews.
To do that, we will use expression syntax @{} inside a view for binding. For example, the first text view in the layout.xml file is bind with the name field of the UserModel. In conclusion, the final syntax will be @{user.name} and the same scenario with other text views such as shown below.
<?xml version="1.0" encoding="utf-8"?>
<layout xmlns:android="http://schemas.android.com/apk/res/android"
    xmlns:tools="http://schemas.android.com/tools">
    <data>
        <variable
            name="user"
            type="com.tutorialscache.databindingexample.UserModel" />
    </data>
    <RelativeLayout
        android:layout_width="match_parent"
        android:layout_height="match_parent"
        tools:context="com.tutorialscache.databindingexample.MainActivity">
        <TextView
            android:id="@+id/nameTv"
            android:layout_height="wrap_content"
            android:layout_width="wrap_content"
            android:text="@{user.name}" />
        <TextView
            android:id="@+id/emailTv"
            android:layout_height="wrap_content"
            android:layout_width="wrap_content"
            android:text="@{user.email}" />
        <TextView
            android:id="@+id/cityTv"
            android:layout_height="wrap_content"
            android:layout_width="wrap_content"
            android:text="@{user.city}" />
    </RelativeLayout>
</layout>
6. Creating Instance of UserModel Class
Now we will create a new instance of UserModel class in our MainActivity.java class. So, this model class object will be used for further operations.
public class MainActivity extends AppCompatActivity {
    ActivityMainBinding binding;
    UserModel users;
    @Override
    protected void onCreate(Bundle savedInstanceState) {
        super.onCreate(savedInstanceState);
        binding= DataBindingUtil.setContentView(this,R.layout.activity_main);
       //Creating Instance of UserModel Class
        users=new UserModel();
    }
7. Binding Click Listeners / Event Handling
- Data Binding allows us to bind the click events and also other events with UI elements. To bind a click event, we need to create an inner class with the necessary callback methods. As a result, we have an inner class and name it as MyHandler that handles the onButtonClick event. Such as shown below,
public class MainActivity extends AppCompatActivity {
    ActivityMainBinding binding;
    UserModel users;
    @Override
    protected void onCreate(Bundle savedInstanceState) {
        super.onCreate(savedInstanceState);
        binding= DataBindingUtil.setContentView(this,R.layout.activity_main);
        //Creating Instance of UserModel Class
        users=new UserModel();
        //initializing class
        MyHandler handler=new MyHandler();
        //binding handler class
        binding.setHandler(handler);
    }
    //Inner Class
    public class MyHandler {
        //method for click on button
        public void onButtonClick(View view) {
       //write code for button click
          }
    }
}
- To bind the event, we again use the same <variable> tag with the path to the handler class. Such as shown below where android:onClick=”@{handler::onButtonClick}” binds the button click to onButtonClick() method.
<?xml version="1.0" encoding="utf-8"?>
<layout xmlns:android="http://schemas.android.com/apk/res/android"
    xmlns:tools="http://schemas.android.com/tools">
    <data>
        <variable
            name="handler"
            type="com.tutorialscache.databindingexample.MainActivity.MyHandler" />
    </data>
    <RelativeLayout
        android:layout_width="match_parent"
        android:layout_height="match_parent"
        tools:context="com.tutorialscache.databindingexample.MainActivity">
        <Button android:id="@+id/button"
            android:layout_height="wrap_content"
            android:layout_width="wrap_content"
            android:onClick="@{handler::onButtonClick}" />
    </RelativeLayout>
</layout>
8. Final activity_main.xml
Here is activity_main.xml full code.
<?xml version="1.0" encoding="utf-8"?>
<layout xmlns:android="http://schemas.android.com/apk/res/android"
    xmlns:tools="http://schemas.android.com/tools">
    <data>
        <variable
            name="user"
            type="com.tutorialscache.databindingexample.UserModel" />
        <variable
            name="handler"
            type="com.tutorialscache.databindingexample.MainActivity.MyHandler" />
    </data>
    <RelativeLayout
        android:layout_width="match_parent"
        android:layout_height="match_parent"
        tools:context="com.tutorialscache.databindingexample.MainActivity">
        <TextView
            android:layout_height="wrap_content"
            android:layout_width="wrap_content"
            android:text="CreateProfile"
            android:layout_marginTop="40dp"
            android:textSize="25sp"
            android:textColor="@color/colorAccent"
            android:layout_centerHorizontal="true"
            android:id="@+id/createprofile_txt" />
        <EditText
            android:id="@+id/nameEdit"
            android:layout_below="@id/createprofile_txt"
            android:layout_marginTop="15dp"
            android:inputType="textPersonName"
            android:hint="Enter Your Name"
            android:layout_width="300dp"
            android:layout_centerHorizontal="true"
            android:layout_height="wrap_content" />
        <EditText
            android:id="@+id/emailEdit"
            android:layout_below="@id/nameEdit"
            android:hint="Enter Your Email"
            android:layout_marginTop="15dp"
            android:inputType="textEmailAddress"
            android:layout_width="300dp"
            android:layout_centerHorizontal="true"
            android:layout_height="wrap_content" />
        <EditText
            android:id="@+id/cityEdit"
            android:layout_below="@id/emailEdit"
            android:layout_marginTop="15dp"
            android:inputType="text"
            android:hint="Enter Your City"
            android:layout_width="300dp"
            android:layout_centerHorizontal="true"
            android:layout_height="wrap_content" />
        <Button android:id="@+id/button"
            android:layout_below="@id/cityEdit"
            android:layout_height="wrap_content"
            android:text="Show Profile"
            android:textColor="#ffff"
            android:background="@color/colorAccent"
            android:layout_marginTop="10dp"
            android:onClick="@{handler::onButtonClick}"
            android:layout_centerHorizontal="true"
            android:layout_width="150dp" />
        <TextView
            android:id="@+id/nameTv"
            android:layout_height="wrap_content"
            android:layout_width="wrap_content"
            android:layout_marginTop="20dp"
            android:text="@{user.name}"
            android:layout_below="@id/button"
            android:textSize="15sp"
            android:layout_centerHorizontal="true" />
        <TextView
            android:id="@+id/emailTv"
            android:layout_height="wrap_content"
            android:layout_width="wrap_content"
            android:layout_marginTop="10dp"
            android:text="@{user.email}"
            android:layout_below="@id/nameTv"
            android:textSize="15sp"
            android:layout_centerHorizontal="true"/>
        <TextView
            android:layout_height="wrap_content"
            android:layout_width="wrap_content"
            android:layout_below="@id/emailTv"
            android:text="@{user.city}"
            android:layout_marginTop="10dp"
            android:textSize="15sp"
            android:layout_centerHorizontal="true"
            android:id="@+id/cityTv" />
   </RelativeLayout>
</layout>
9. Final MainActivity.java
Here is MainActivity.java full code.
package com.tutorialscache.databindingexample;
import androidx.appcompat.app.AppCompatActivity;
import androidx.databinding.DataBindingUtil;
import android.os.Bundle;
import android.view.View;
import android.widget.Toast;
import com.tutorialscache.databindingexample.databinding.ActivityMainBinding;
public class MainActivity extends AppCompatActivity {
    ActivityMainBinding binding;
    String name,email,city;
    //Creating Instance of UserModel Class
    UserModel users;
    @Override
    protected void onCreate(Bundle savedInstanceState) {
        super.onCreate(savedInstanceState);
        binding= DataBindingUtil.setContentView(this,R.layout.activity_main);
        users=new UserModel();
        //initializing class
        MyHandler handler=new MyHandler();
        //binding handler class
        binding.setHandler(handler);
    }
    //Inner Class
    public class MyHandler {
        //method for click on button
        public void onButtonClick(View view) {
            //storing edit text value in name
            name=binding.nameEdit.getText().toString();
            email=binding.emailEdit.getText().toString();
            city=binding.cityEdit.getText().toString();
            //check id stings are empty in edittext
            if (name.isEmpty()||email.isEmpty()||city.isEmpty())
            {
                Toast.makeText(MainActivity.this,"Empty Fields",Toast.LENGTH_SHORT).show();
            }
            else {
                users.setName("YourName:"+name);
                users.setEmail("YourEmail:"+email);
                users.setCity("YourCity:"+city);
                //sets values to data variable
                binding.setUser(users);
            }
        }
    }
}


Comments are closed.